
Growing Water Spinach In A Planter Bag: Day 0-Day 30
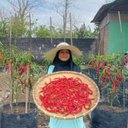
Our brains are designed to find solutions. Right? When we face limitations, our brains create new solutions to those limitations.

It's like gardening in our backyard. It doesn't matter if our house doesn't have access to fertile soil or if there's no soil to dig. In fact, nowadays, people tend to create mini gardens on their balconies or rooftops. Limited space isn't a problem.
Of course, there are many creative products that offer solutions, especially when it comes to planting containers.
Well, a while ago, a brand contacted me. They asked me to promote their product. They sent me the product: a rectangular planter bag.
I was happy to help them promote the product. Although they didn't pay me any money, I was able to get the planter bag for free. And I hope the video I made on TikTok can help spread the word. Because I've used this product and find it very useful for gardening in my yard. Especially for gardening in a concreted area.

First, I prepared the planting medium for this planter bag. I collected banana stems from the back of the housing complex where I rented the house.
To make it easier to fill the planter bag, I used two bamboo poles on the right and left sides. The right and left sides of the planter bag already have holes for placing wood or bamboo, ensuring the planter bag's stability.
For the first layer, I added wooden twigs, but not sharp ones, so they would be secure and wouldn't tear the planter bag.

After I finished arranging the wooden twigs, I added chopped banana stems. A fairly thick layer is fine, as banana stems will shrink quickly.

During the dry season, and in tropical areas, it's good to use chopped banana stems at the bottom of the planting medium.
After I finished with the chopped banana stems, I added a layer of grass. This grass layer keeps the topsoil from dripping into the gaps in the banana stems.
The top layer is crucial for planting seeds directly. I mixed topsoil, burnt rice husks, and goat manure in a 2:1:1 ratio. More loose soil.

After I finished with the growing medium in the planter bag, I immediately sowed the water spinach seeds. Although they're called water spinach, they can easily grow in soil. They're very easy to care for and have minimal pests if the growing medium is healthy.
I made holes with my finger. Try to make the holes neatly aligned so the water spinach will grow neatly.
You can fill the planting hole with 2-4 water spinach seeds in case some don't germinate.
In 5-7 days, the water spinach seeds will germinate. They're strong in direct sunlight all day long. Make sure they get enough water. Water regularly twice a day.


To protect against stray cats, I put a protective cover over the top of the planter bag.

They're just like sticks and don't cover the entire planter bag to allow sunlight to penetrate for plant growth.

Every week, I add more growing medium.

And at 10 and 20 days, I add manure. Fermented goat manure is fine and odorless, so it's safe to use.

At 30 days after sowing, or even as early as 25 days, the water spinach can be harvested.

You can simply cut the bottom stems. Leave a few stems so they can grow again.

This way, you can harvest the water spinach repeatedly. The stems look large, even if you only use a little topsoil.

After the water spinach was harvested, I checked the growing medium. The weeds had completely died out, leaving only a few pieces of banana stem at the bottom of the planter bag.
So, even in front of the house, you can try to grow vegetables for your consumption organically. Happy gardening!
Best Regards,
Anggrek Lestari

Anggrek Lestari is an Indonesian fiction writer who has published two major books. Now She is a full-time content creator. She has a goal to share life, poem, and food content that makes others happy and can get inspiration.
Contact Person: [email protected]
Discord: anggreklestari#3009
I admire the great work you're doing. How wonderful that I contacted you to promote a product; I hope you have much success.
I loved the way you planted the water spinach and the substrate you used; it yielded excellent results.
Excellent work, dear friend @anggreklestari.
Have a beautiful day.
I hope you can start gardeninb with your family 😊
Wow, that's a really good idea, putting banana stems in the planting medium to maintain soil moisture, I like this, I'll try it in my garden
Banana stems really good for plants. You should try it
oh looks awesome. that is something that i have always WANTED to grow, but i never have. it certainly looks fresh and tasty. Great idea using the banana stems.
happy gardening
blingit
You can start with small thing, like microgreens 😊
oh i love microgreens. i have grown them in the past and had periods where i always have them on the grow. i even made a "microgreen corner" on the kitchen bench. we just ate them so fast i needed loads of space to grow them.. lol... i like mustard greens best. or peas, but they took such a bit of space :-)
Thats actually a really nice product. The shape and the suze is also just right if ever u want them in your yard, balcony, or whatever part of your house. And coz its rectangular, you can just put them in one corner and it won't be on the way. I think its a cool product. Anyways, you already put them into good use ha. You really have a green thumb.
Yeah, the shape, also the good material. Really good to gardening in the yard
Thank you ♥️
i couldn't stop looking at how neat, nice and clean your garden looks, you must be naturally gifted when it comes to making a garden, i love wjat i see.
Thank you for enjoying my garden view 😊
It’s amazing to see how organized your garden is, @anggreklestari. You seem to do this professionally (really).
So much ingenuity! Fantastic!