How to sprout and grow garlic at home easily! | ¡Como germinar y cultivar ajos en casa súper fácil!
Hola comunidad de HIVE, nuevamente aquí les traigo otra de las actividades que realizo en mi casa. En esta oportunidad se trata del cultivo de los ajos, esa deliciosa raíz aromática que tanto sabor le da a nuestros platos al momento de cocinar. Les voy a mostrar paso a paso cómo hacerlos germinar y cómo plantarlos.

Saludos comunidad de HIVE! (imagen propia).
Lo primero es conseguir algunos bulbos de los ajos que más prefieran ya que existen muchas variedades pero cualquiera sirve con este método. Yo voy a utilizar de esta variedad que son pequeños pero con un sabor muy intenso que destaca en la preparación de las comidas.
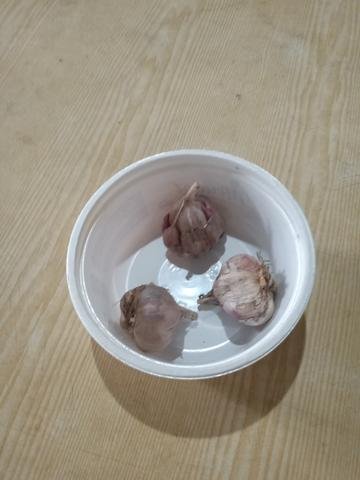
Conseguir uno o varios bulbos de ajos en la tienda o mercado. (imagen propia).
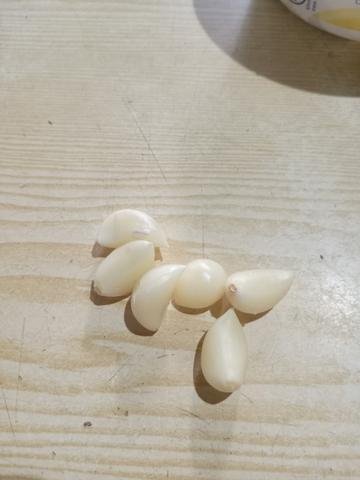
Luego que tengan los ajos a su gusto procedemos a retirarles toda la cáscara hasta dejarlos completamente pelados. Aquí hay que tener mucho cuidado de no dañar la parte superior del diente (el pico) ya que es por este extremo por el cual brotarán las hojas.

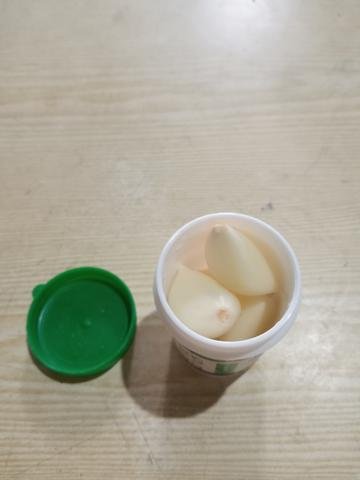
Luego en un frasco, lo suficientemente grande para que entren todos los dientes que se desean plantar los metemos todos. En mi caso voy a utilizar este pequeño frasco de plástico con tapa, pero cualquier frasco que ustedes tengan a la mano les sirve sea de vidrio o de metal, incluso si no tienen frascos adecuados a la mano pueden usar papel aluminio. Y si el frasco no tiene tapa pueden taparlo con papel aluminio.
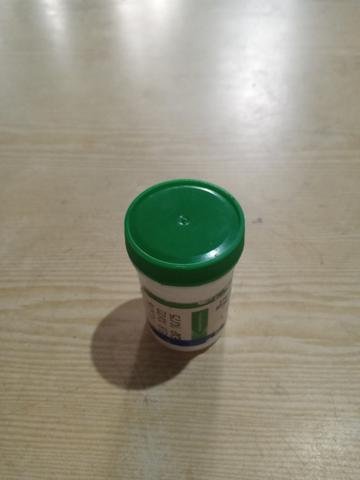
Finalmente vamos a meter el frasco con nuestros ajos dentro de la nevera en la parte más alejada del congelador. Yo en mi caso los coloqué en la puerta en la parte más baja. Es muy importante que no se congelen porque si se congelan se muere la simiente y no queremos que eso ocurra. Los vamos a mantener dentro de la nevera por un lapso de dos a tres meses donde les dé frío sin congelarse.

Meter el frasco con los ajos dentro de la nevera lejos del congelador (imagen propia).
Estaremos revisándolos por lo menos una vez a la semana como les dije por un periodo aproximado de dos a tres meses. Sabremos cuando ya estén listos para plantarlos cuando veamos que comienzan a brotar por la parte superior, por el lado más fino. Cuando veamos que sale una pequeña espiga blanca por la punta ya podemos sacarlos de la nevera y preparar tierra para plantarlos. Al momento de plantarlos los sembraremos con la punta del brote hacia arriba que sobresalga de la tierra. Tengan cuidado de no sembrarlos con el brote hacia abajo y tampoco de lado porque se daña la semilla y la perderemos.

Otro detalle importante es que si vives en un lugar donde hace mucho calor o sol debes colocarlos a la sombra ya que el ajo es un cultivo que no tolera el calor. Lo ideal es dejarlos crecer donde le dé el resplandor del sol pero muy poco sol directo ya que no lo toleran mucho.
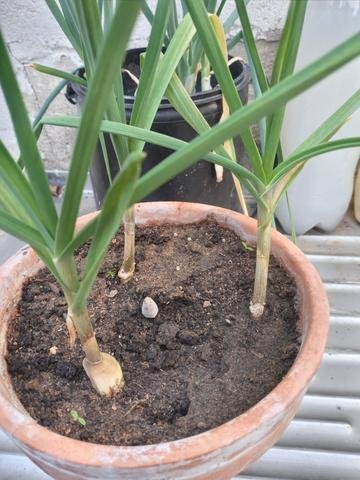
Luego de la siembra tendremos que esperar entre tres a cuatro meses para cosecharlos. Como pueden ver yo tengo algunas plantas ya grandes de un mes aproximadamente y cuando sea el momento de cosecharlas se los estaré mostrando por aquí.
Muchísimas gracias por leerme, dale clic a me gusta si te ha gustado este contenido y sígueme que aún tengo mucho más cosas interesantes para enseñar. También me ayudas mucho si le das rebloguear este post para que más personas a las que les interesan estos temas puedan ampliar sus conocimientos. Gracias, ¡nos vemos pronto!
---
ENGLISH VERSION
(AI translated with Google Gemini)
Hello HIVE community, here I bring you again another of the activities I do at my home. This time it is about the cultivation of garlic, that delicious aromatic root that gives so much flavor to our dishes when cooking. I am going to show you step by step how to make them germinate and how to plant them.
Greetings HIVE community! (own image).
The first thing is to get some garlic bulbs that you prefer since there are many varieties but any one works with this method. I am going to use this variety that are small but with a very intense flavor that stands out in the preparation of meals.
Get one or several garlic bulbs at the store or market. (own image).
After you have the garlic to your liking, we proceed to remove all the peel until they are completely peeled. Here you have to be very careful not to damage the upper part of the clove (the tip) since it is through this end that the leaves will sprout.
Then in a jar, large enough to fit all the cloves you want to plant, we put them all in. In my case, I am going to use this small plastic jar with a lid, but any jar you have at hand will work, whether it is glass or metal, even if you don't have suitable jars at hand you can use aluminum foil. And if the jar does not have a lid you can cover it with aluminum foil.
Finally we are going to put the jar with our garlic inside the refrigerator in the part furthest from the freezer. In my case, I placed them in the door at the lowest part. It is very important that they do not freeze because if they freeze the seed dies and we do not want that to happen. We are going to keep them inside the refrigerator for a period of two to three months where they get cold without freezing.
Put the jar with the garlic inside the refrigerator away from the freezer (own image).
We will be checking them at least once a week as I told you for a period of approximately two to three months. We will know when they are ready to be planted when we see that they begin to sprout from the top, on the thinnest side. When we see a small white spike coming out of the tip, we can take them out of the refrigerator and prepare the soil to plant them. When planting them, we will plant them with the tip of the sprout upwards, protruding from the ground. Be careful not to plant them with the sprout downwards and not sideways either because the seed will be damaged and we will lose it.
Another important detail is that if you live in a place where it is very hot or sunny you should place them in the shade since garlic is a crop that does not tolerate heat. The ideal is to let them grow where they get the glare of the sun but very little direct sun since they do not tolerate it much.
After planting we will have to wait between three to four months to harvest them. As you can see I already have some large plants of about a month old and when it is time to harvest them I will be showing it to you here.
Thank you very much for reading me, click like if you liked this content and follow me as I still have much more interesting things to show. You also help me a lot if you reblog this post so that more people who are interested in these topics can expand their knowledge. Thanks, see you soon!